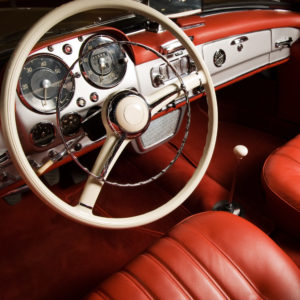
 Classic cars have the uncanny ability to catch the eye when viewed from a distance. There’s really no way around it, seeing a classic car tear down the highway is a tremendous sight. However, the inside of a classic car really does matter just as much as its exterior appearance. After all, if you intend to actually drive your vintage vehicle, the interior will have a massive effect on your enjoyment of it. With that in mind, today we’re here to offer a few professional tips so that you can get the most from a classic car interior restoration project yourself. Check them out for yourself:
#1 Assess & Inspect
Ideally, you should inspect any car thoroughly before you buy it. There are all sorts of red flags you can look for (including rust on the frame), but when it comes to the interior be sure to note any scratches, rips, stains, or imperfections in plain view. If at all possible, write a running list on a notepad or on your smartphone; it’ll help you keep track of the repairs later on.
#2 Disassemble
Once you’ve established what work needs to be done, it’s time to get down to brass tacks. You can start by removing any items that you want to recondition and/or paint. Trying to recondition items that are still in the car british dragon is a bad idea for a bunch of reasons –– so always remove carpet, seats, and plastic parts that you plan on fixing up. Also, while disassembling be cognizant of any hidden screws holding items down. The last thing you want to do is damage a seat because you yanked it out. Take your time and be patient instead.
#3 Clean, Recondition, Paint, Sew
Now that you’ve managed to extricate everything from your vehicle you can begin to perform individual maintenance on the parts. There’s no “next step” at this point of the process, so we’ll simply list a number of things you’ll want to address to spruce up your interior:
- Sand off any rust you see on door panels, metal seat frames, or metal boards under the carpet.
- Clean the seats. How you go about cleaning the seats, though, depends on the material used in your car. (And it’s rarely just one material.) You can purchase special cleaning products from a local auto parts store or rent a steam cleaner from a nearby laundromat if need be.
- Clean plastic pieces and apply vinyl interior dye. Spray on a coat of paint, let it dry, then do it again. If you’re changing the color of your interior, however, you may have to apply more layers of paint to achieve the look you desire.
- Stitch and sew. If there are any rips or tears in the upholstery you’ll probably need an industrial sewing machine to amend them.
- Clean the dashboard (not with soap and water, with an actual cleaning solution).
- If you’ve removed the headliner, then apply adhesive and install the new one.
#4 Reassemble in Reverse Order
After you’ve let everything dry (important –– don’t forget it!) you can now reassemble the interior of your vehicle in reverse order. That is, assuming you haven’t had to order any new parts, fabrics, or materials. In some instances, the upholstery and/or seats in classic cars may be so damaged that repairs are impossible. If that’s the case, you have two choices: attempt to find replacements elsewhere or install new, custom seats.
Learn More
Tackling a classic car interior restoration all by yourself is a tall order. The good news is, we’re happy to help you out! You can contact us toll free at 1-844-652-1966 today, or email me directly at [email protected]. We have the experience, tools, and commitment to handle any classic car restoration project.